Canning Cranberry Juice DIY: Simple Beginner’s Guide
Ever thought about canning your own cranberry juice? It’s easier than you might think! Not only can you enjoy the fresh taste of cranberries all year round, but you also have control over the ingredients. No more unwanted additives or extra sugar like those store-bought versions. Plus, it’s a fun and rewarding kitchen project. Let’s dive into the world of canning cranberry juice and discover how simple it really is!
Table of Contents
Key Takeaways
- Canning cranberry juice at home lets you control the sweetness and ingredients.
- You only need basic kitchen tools and some fresh cranberries to get started.
- Homemade cranberry juice is free from artificial preservatives.
- The process is simple and can be a fun activity for the whole family.
- Enjoy fresh cranberry juice anytime, not just during the holiday season.
Introduction to Canning Cranberry Juice
Canning cranberry juice at home is a fantastic way to enjoy the tangy, refreshing taste of cranberries all year round. If you’ve ever thought about preserving cranberry juice, you’re in for a treat. Canning fruit juice like cranberry isn’t just about extending its shelf life; it’s also about capturing the pure, unadulterated flavor of fresh cranberries.
When you decide to try your hand at canning, you’re stepping into a world where you control the ingredients. No more worrying about added sugars or preservatives found in store-bought options. It’s just you, the cranberries, and a few simple tools.
The beauty of canning your own juice is that you can tailor it to your taste. Want it sweeter? Add a bit more sugar. Prefer it tart? Skip the sweeteners altogether. It’s your juice, your rules.
To get started, you’ll need some basic equipment like a water bath canner, mason jars, and a few other kitchen staples. It’s a small investment that pays off with every sip of your homemade cranberry juice. Plus, once you’ve mastered cranberry juice, you’ll have the skills to explore canning other fruit juices, opening up a whole new world of flavors.
So, why wait? Dive into the satisfying process of canning and enjoy the benefits of preserving cranberry juice at home. It’s easier than you think, and the rewards are oh-so-delicious.
Benefits of Canning Your Own Cranberry Juice

Canning cranberry juice at home is not just about preserving the taste of fresh cranberries, but it also comes with a host of benefits that make the effort worthwhile. Let’s dive into why you should consider making your own homemade cranberry juice.
Nutritional Advantages
When you can your own cranberry juice, you control what goes into it. Store-bought juices often contain loads of added sugars and preservatives that you might want to avoid. By canning at home, you can keep your juice pure and packed with natural nutrients. Cranberries are rich in Vitamin C, which helps boost your immune system, and they contain antioxidants that promote overall health.
- Vitamin C: Supports immune function and helps in the absorption of iron.
- Antioxidants: Protect your cells from damage and reduce inflammation.
- Fiber: Although juicing reduces fiber content, some still remains, aiding digestion.
Cost-Effectiveness
Canning your own juice can also be a more economical choice. Buying fresh cranberries, especially when they’re in season, can be much cheaper than purchasing processed juice. Plus, you can make large batches and store them, saving money in the long run. Here’s a simple comparison:
| Item | Cost |
|---|---|
| Store-bought juice (1 qt) | $3.50 – $5.00 |
| Homemade (1 qt) | $1.50 – $2.50 (when in season) |
Making your own cranberry juice means you get to enjoy the pure, tart flavor of cranberries without any unwanted additives. It’s a small step towards healthier living and a more sustainable lifestyle.
By canning at home, you not only save money but also enjoy the satisfaction of knowing exactly what you’re consuming. So, why not give it a try and savor the taste of homemade cranberry juice all year round?
Essential Equipment for Canning
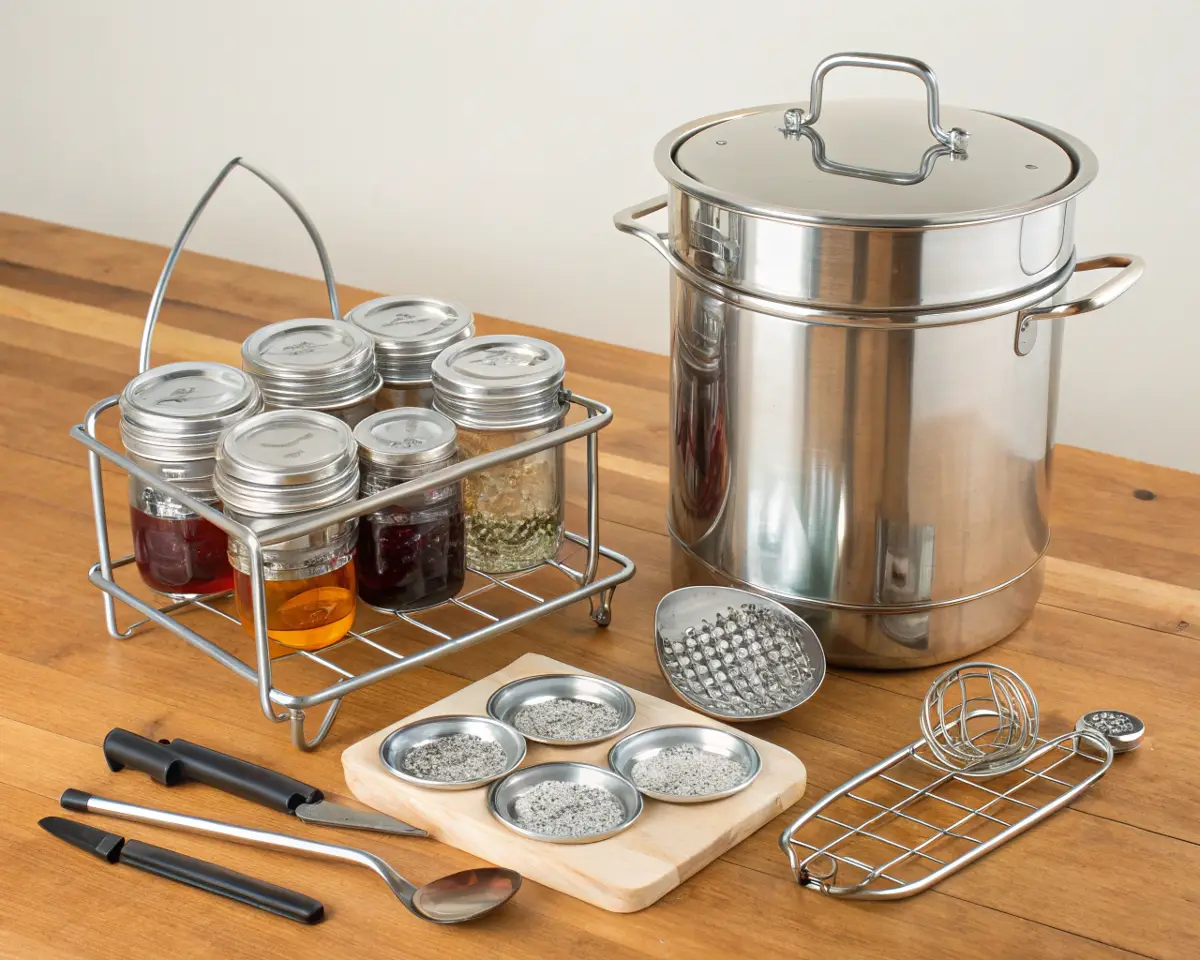
When you’re getting ready to can your own cranberry juice, having the right tools is a game changer. Without the right equipment, the process can become a hassle. Here’s a list of what you’ll need to make your canning journey smooth and successful:
- Water Bath Canner: This is your main tool. It’s a large pot that allows you to submerge jars in boiling water, ensuring your cranberry juice is safely preserved.
- Quart Canning Jars with Lids and Rings: These are essential for storing your juice. Make sure to use canning-specific jars, as regular glass jars might not withstand the heat.
- Jar Lifter: This handy tool helps you safely remove hot jars from boiling water without risking burns.
- Measuring Cups: Precise measurements are key when canning, especially when it comes to sugar and cranberries.
- Funnel: A wide-mouth funnel is perfect for pouring your juice into jars without making a mess.
- Towel: A simple kitchen towel is useful for wiping jar rims and ensuring a good seal.
Remember, the temperature of your jars and canner should match to avoid breakage. Hot jars into a hot canner, always!
Having these tools on hand will make the process of canning cranberry juice much easier and more enjoyable. Once you have everything ready, you’ll be all set to start preserving that delicious homemade juice for future enjoyment.
For more detailed instructions, check out this guide on the essential equipment needed for canning cranberries.
Step-by-Step Guide to Canning Cranberry Juice
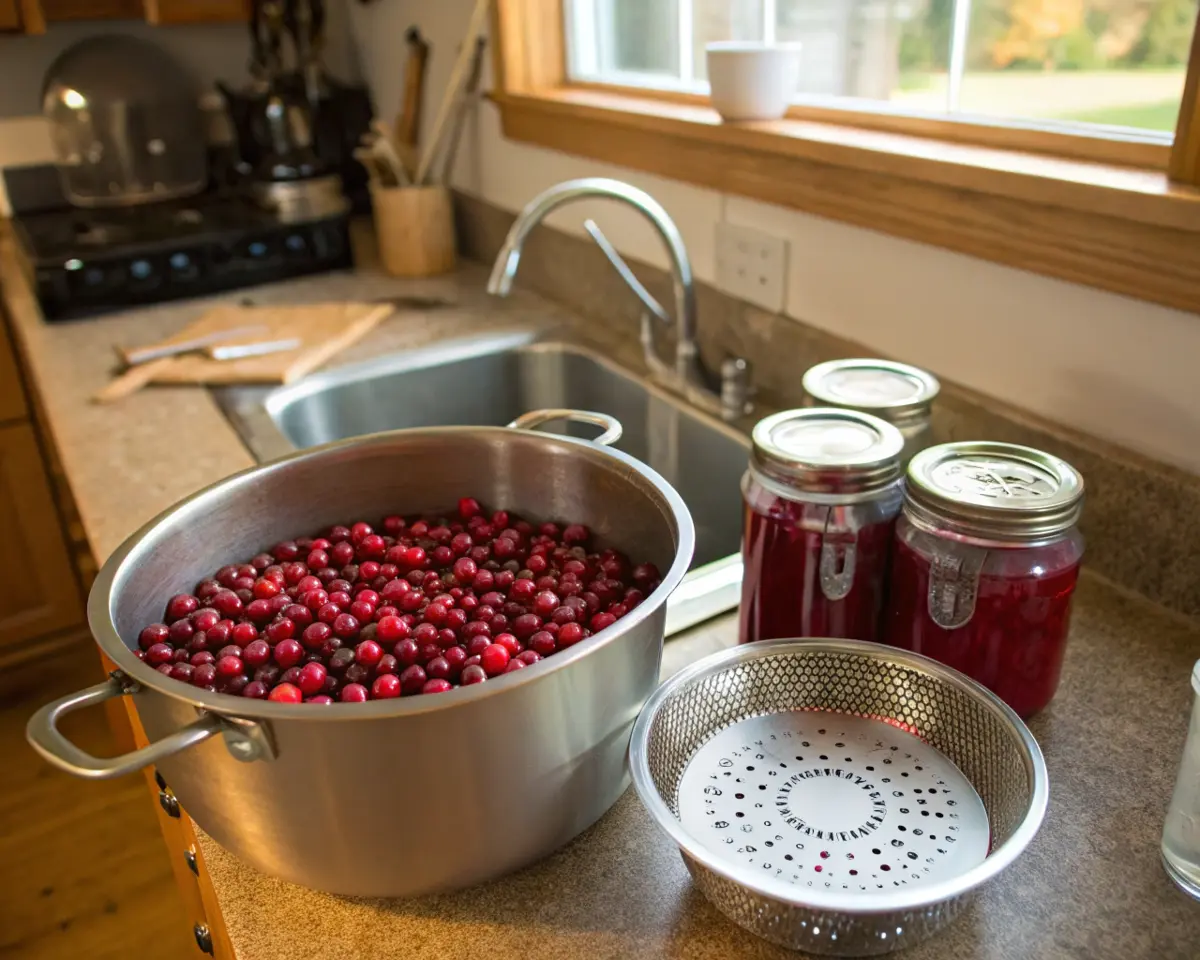
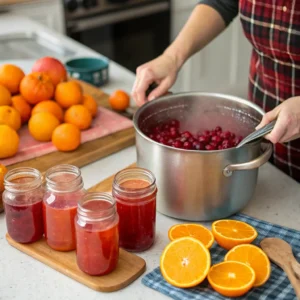
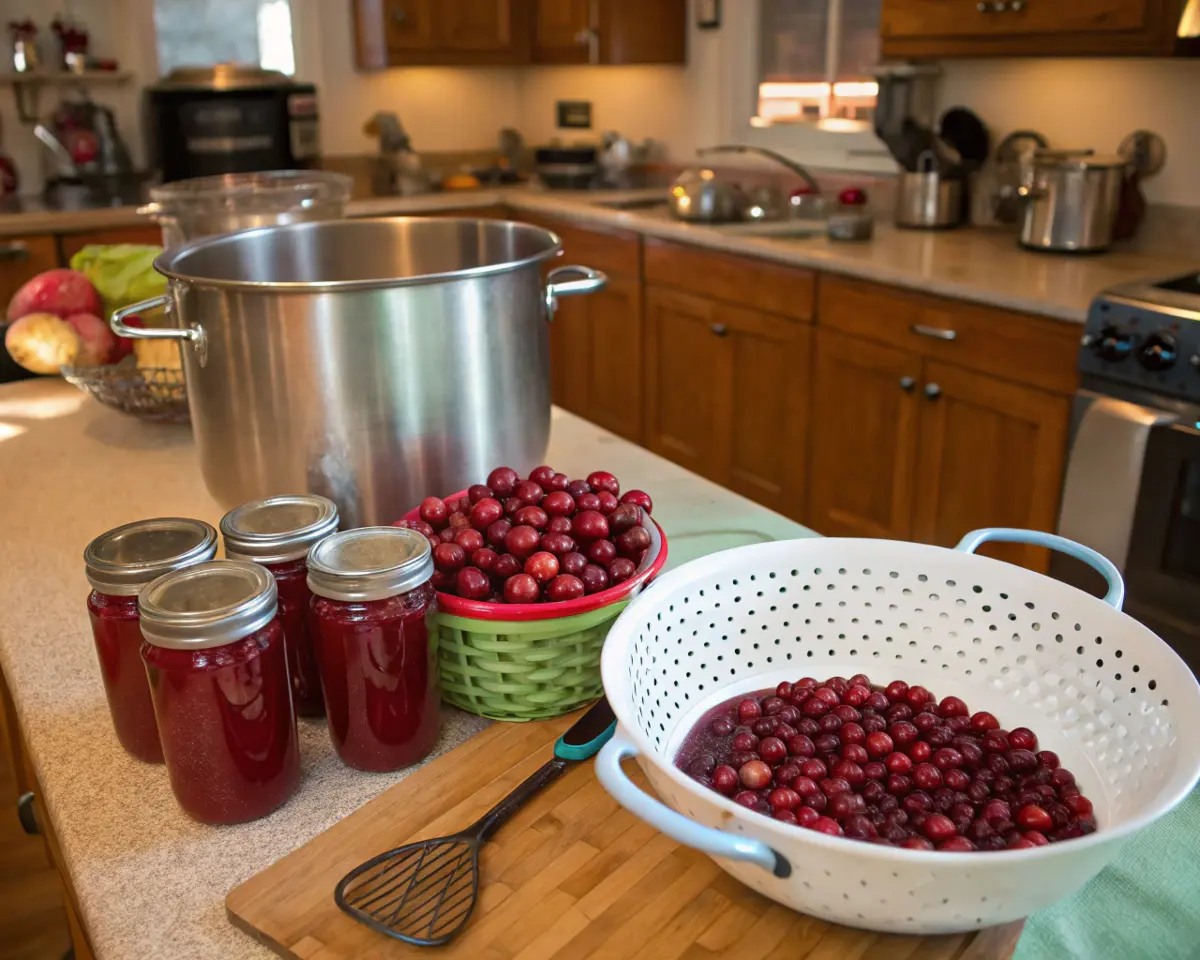
Preparing the Cranberries
First things first, you need to get those cranberries ready. Start by washing them thoroughly. Soak the fresh cranberries in your favorite fruit and veggie wash, then rinse them well. Pick out any that look blemished or rotten. This step is crucial for ensuring you have the best quality juice.
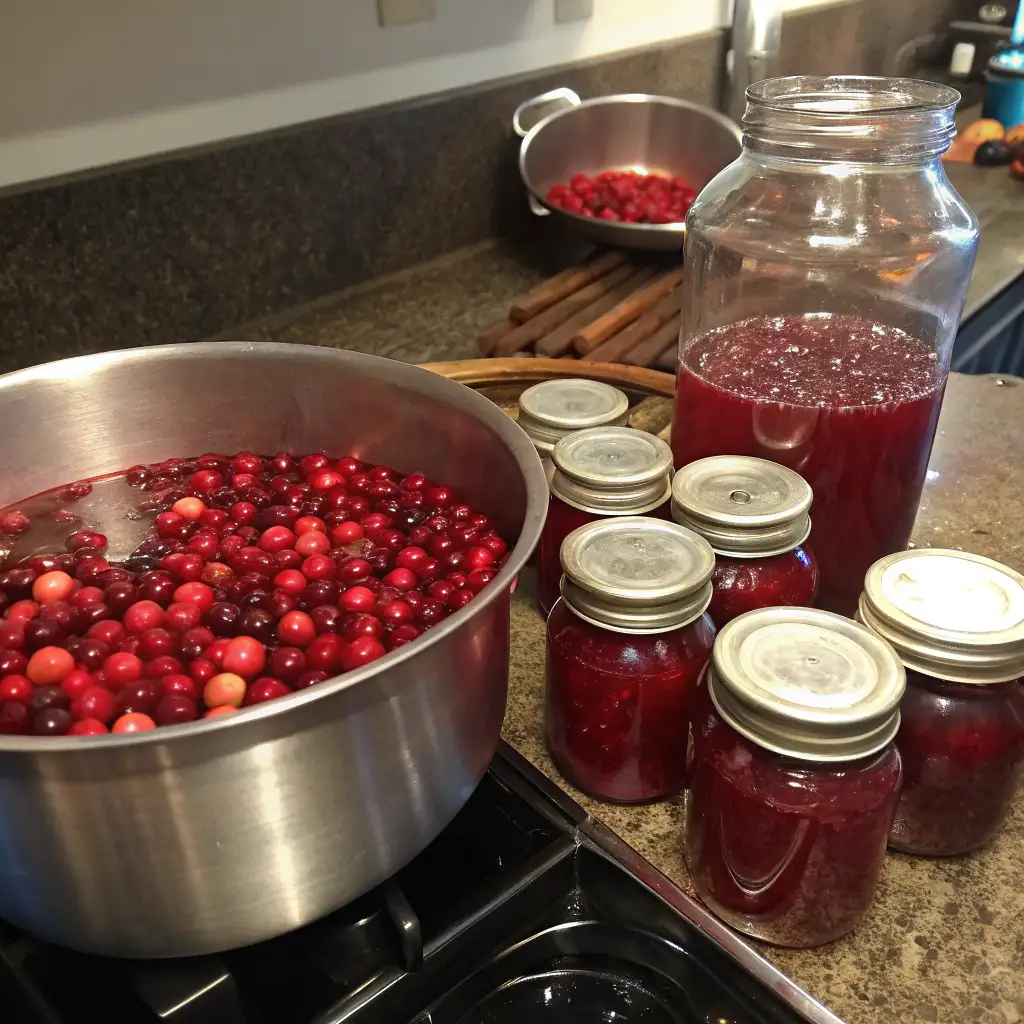
Juicing Process
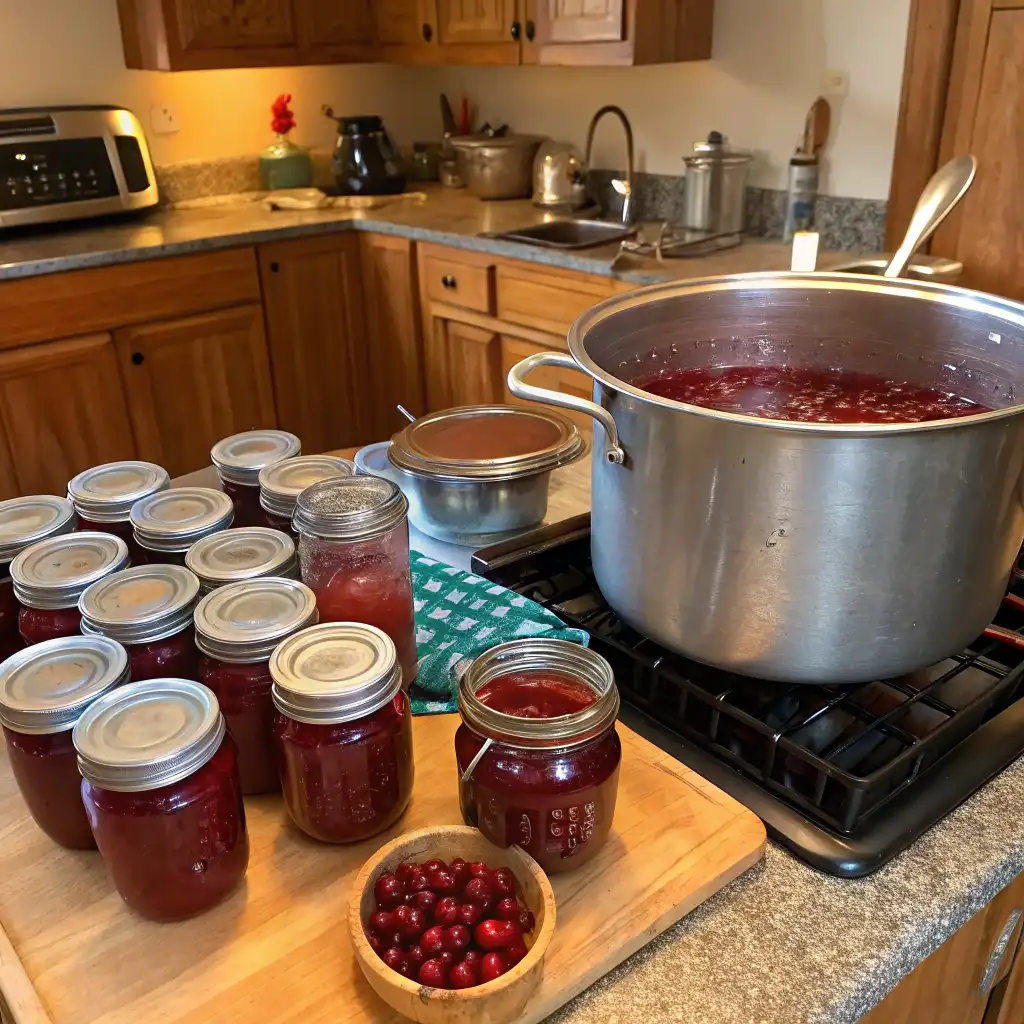
Now, it’s time to juice. Pour the cranberries into a large pot and add enough water to cover them. Bring the mixture to a gentle simmer and let it cook for about 5 to 10 minutes. Once the berries start to burst, strain the mixture using a fine mesh sieve or cheesecloth to separate the juice from the pulp. You might need to do this a couple of times to get clear juice. Remember, easy juice canning recipes often recommend simmering the pulp again with more water to extract every bit of flavor.
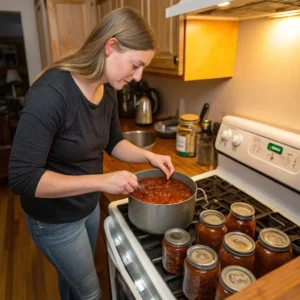
Sterilizing the Jars
Sterilizing your jars is a must. Wash the canning jars and lids in very hot, soapy water or submerge them in boiling water. This step ensures that your jars are free from any bacteria that could spoil your juice. Keep the jars warm until you’re ready to use them.
Sealing and Storing
Pour the hot juice into the preheated jars, leaving about 1/4 inch of headspace. Wipe the rims of the jars clean to ensure a proper seal, then place the lids on top. Lower the jars into a water bath canner, making sure the water covers them by at least an inch. Bring the water to a full rolling boil and process the jars for about 10 minutes. Once done, remove the jars and let them cool on a heat-safe surface. Check the seals after cooling to make sure they’re tight, and store your homemade cranberry juice in a cool, dark place.
Canning your own cranberry juice might seem like a lot of work, but the satisfaction of opening a jar of your own creation is worth every step. Plus, it’s a great way to enjoy the taste of cranberries all year round!
Common Mistakes to Avoid
When it comes to canning cranberry juice, there are a few pitfalls that many people stumble into. Let’s talk about some of these common mistakes so you can avoid them and ensure your juice turns out just right.
- Not Adjusting for Altitude: This is a big one! If you live at a higher elevation, you need to adjust your processing time. Above 1,000 feet, add an extra 5 minutes. If you’re over 6,000 feet, tack on 10 minutes to your canning time.
- Skipping the Vinegar Wipe: Before sealing your jars, make sure to wipe the rims with a cloth dipped in vinegar. This step removes any grease or residue that might prevent a proper seal.
- Ignoring the Temperature Match: It’s crucial to have your jars and canner at the same temperature. If the jars are too cold compared to the canner, they might crack during the process.
- Overlooking the Seal Test: After canning, listen for the satisfying “ping” of the lids as they seal. This sound indicates a proper seal, ensuring your juice is preserved safely. Listening for the ping is a good practice to ensure everything is sealed correctly.
Remember, canning is a bit of a science, but once you get the hang of it, you’ll be preserving cranberry juice like a pro! Keep these tips in mind, and you’ll avoid the most common blunders.
Conclusion and Tips for Enjoying Your Cranberry Juice
Congratulations, you’ve made it to the end of your cranberry juice canning journey! Now, let’s talk about how to enjoy that delicious homemade juice.
- Patience is Key: Allow your cranberry juice to sit in a cool, dark place for at least 4-6 weeks. This waiting period helps the flavors to fully develop, giving you a richer taste.
- Mix it Up: Your cranberry juice isn’t just for drinking straight. Mix it with tonic water for a refreshing drink, or add it to cocktails like vodka cranberries for a delightful twist.
- Breakfast Boost: Pour yourself a glass of cranberry juice in the morning to kickstart your day with a burst of flavor and nutrients.
“Enjoy your homemade cranberry juice knowing it’s packed with goodness and less sugar than store-bought versions.”
Remember, storing your canned juice properly is crucial. Keep it in a cool, dark place and once opened, refrigerate and consume within a week. With these cranberry juice processing tips, you’re all set to savor every drop of your homemade creation!
Frequently Asked Questions
What is the best way to store canned cranberry juice?
You should store canned cranberry juice in a cool, dark place. Make sure the jars are sealed properly before storing them. They can last up to a year if stored correctly.
Do I need to add sugar when canning cranberry juice?
Adding sugar is optional. It helps enhance the flavor, but you can make cranberry juice without it if you prefer a more natural taste.
Can I use frozen cranberries for canning?
Yes, you can use frozen cranberries. Just make sure they are thawed before you begin the canning process.