
Table of Contents
Tomato soup and grilled cheese sandwiches are a match made in heaven. When fall hits and the garden’s done, you’re left with a ton of tomatoes. That’s when canning comes to the rescue! With a bunch of tomato plants in the yard, figuring out what to do with all those tomatoes can be a challenge. My buddy showed me how to make canned tomato soup, and it’s a lifesaver. As a busy mom, she knows how to make meal prep quick and easy.
We started with a mix of romas and bigger tomatoes, threw in some green peppers and onions, and got to work. Canning soup has its quirks, like making sure you don’t use thickeners like flour or cream, which aren’t safe for canning. You also need to add acid to keep it shelf-stable. Stick to the right ratio of veggies to tomatoes, and you’re golden. Let’s dive into the nitty-gritty of canning tomato soup!
Key Takeaways
- Tomato soup and grilled cheese sandwiches are a classic combo, especially when the weather cools down.
- With a big tomato harvest, canning is a great way to preserve your bounty.
- Avoid using flour or cream in canned soup to prevent spoilage.
- Adding acid, like lemon juice, is crucial for safe canning.
- Stick to recommended veggie-to-tomato ratios for the best results.
Introduction to Canning Tomato Soup
Canning tomato soup at home might sound like a daunting task, but it’s a rewarding endeavor that lets you enjoy the taste of fresh tomatoes all year long. Imagine opening a jar of your homemade tomato soup in the middle of winter, bringing a taste of summer to your table. This guide will walk you through the basics, making the process approachable and fun.
When you’re canning tomato soup, you’re essentially preserving the essence of ripe tomatoes in a jar. It’s a fantastic way to make use of an abundant tomato harvest or take advantage of seasonal produce. And the best part? You can tailor the flavor to your liking, adding herbs and spices that suit your taste.
Here’s a quick rundown of what you’ll need to get started:
- Fresh, ripe tomatoes (Roma tomatoes are a great choice)
- Canning jars and lids
- A pressure canner or water bath canner
- Basic kitchen tools like a knife, cutting board, and a large pot
Before you dive into canning, it’s important to understand the role of acidity in preserving your soup. Adding a cup of water or lemon juice can help maintain the right pH level, ensuring your soup is safe and shelf-stable. For those worried about altering the flavor, citric acid is a good alternative that won’t affect the taste.
“Canning is not just about preserving food; it’s about capturing memories and flavors that can be savored later, transforming simple ingredients into something special.”
With your ingredients and equipment ready, you can start the process of turning fresh tomatoes into a delicious, long-lasting soup. Whether you’re using fresh tomatoes or opting for canned tomatoes, the method remains straightforward. Remember, the key is to enjoy the process and savor the results. So, roll up your sleeves and let’s get started on this flavorful journey!
Benefits of Canning Your Own Tomato Soup
Canning your own tomato soup is not just a rewarding experience, but it offers numerous perks that make it worth your while. Imagine having a pantry full of delicious, homemade tomato soup that’s ready whenever you are. Here are some of the benefits of diving into this tasty endeavor:
- Flavor Control: When you make your own canned tomato soup, you control the ingredients. Want to add a little more garlic or basil? Go for it! You’re the chef.
- Preservation of Freshness: By canning your soup, you lock in the freshness of summer tomatoes, allowing you to enjoy that garden-fresh taste even in the dead of winter.
- Cost-Effective: Canning at home can save you money in the long run. Buying tomatoes in bulk during peak season and preserving them can be much cheaper than buying pre-made soup.
- Healthier Option: Homemade soup means no preservatives or artificial flavors. It’s just pure, wholesome ingredients.
- Sustainability: Canning your own soup reduces waste and is a great way to make use of the bountiful tomato harvest.
Canning tomato soup is a bit like bottling up sunshine. Every jar you open is a reminder of the hard work you put in and the delicious rewards you get to enjoy.
Whether you’re a seasoned canner or just starting out, the benefits of having your own canned tomato soup are undeniable. Plus, it’s a fun and creative way to spend a weekend afternoon.
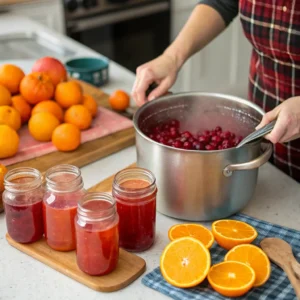
For those interested in preserving other flavors, canning homemade cranberry orange juice is also a simple and enjoyable process. It lets you savor refreshing flavors year-round without any preservatives.
Essential Equipment for Canning
Canning tomato soup at home is a rewarding experience, but having the right tools makes all the difference. Here’s a breakdown of what you’ll need to get started.
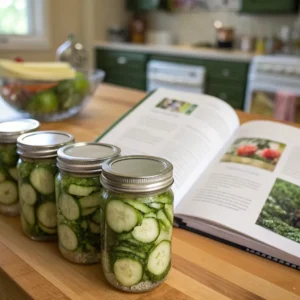
Canning Jars and Lids
First things first, you’ll need jars to store your delicious homemade soup. Canning jars come in pint and quart sizes, so choose based on your storage needs. Make sure to use new lids each time to ensure a proper seal. Rings can be reused as long as they’re not rusty.
Pressure Canner vs. Water Bath Canner
Choosing between a pressure canner and a water bath canner depends on your canning recipe and personal preference. A pressure canner is essential for low-acid foods like tomato soup, ensuring safe preservation by reaching higher temperatures. On the other hand, a water bath canner is simpler and works well for high-acid foods, but might not be as effective for tomato soup unless additional acid like lemon juice is used.
Tip: If you’re just starting out, investing in a pressure canner might be a wise choice for its versatility and safety in canning various foods.
Other Essential Tools
- Food Processor: This handy tool will make prepping your tomatoes a breeze, saving you time and effort.
- Funnel: Helps in pouring your soup into jars without making a mess.
- Jar lifter: Essential for safely removing hot jars from the canner.
Having the right equipment not only makes the process smoother but also ensures your canned soup is safe and delicious for months to come. Happy canning!
Selecting the Best Tomatoes for Soup

When it comes to making a delicious tomato soup, choosing the right tomatoes is key. You want tomatoes that will give your soup a rich flavor and a thick, satisfying texture. Paste tomatoes are your best bet. They have thicker walls, less water, and more flesh, which means more tomato goodness and less juice.
Why Paste Tomatoes?
- Thicker and Meatier: Paste tomatoes, like Roma or Amish Paste, are known for their dense flesh. This makes them perfect for canning because they don’t water down your soup.
- Faster Thickening: With less water content, your soup will thicken up nicely without needing any added thickeners.
- Great Flavor: Although paste tomatoes might not be as juicy as other varieties, they pack a punch in the flavor department.
Mixing It Up
While paste tomatoes are ideal, don’t shy away from using a mix. Combining different types of tomatoes can bring a depth of flavor to your soup that’s hard to beat. Those random garden tomatoes? They could be just what your soup needs!
Mix and match your tomatoes. A variety can bring out the best in your tomato soup recipe, adding layers of flavor you might not expect.
A Note on Acidity
When canning, it’s important to maintain the right acidity level. Adding a little lemon juice or citric acid to each jar can help keep your soup safe and shelf-stable. Don’t worry, it won’t make your soup taste lemony, just a bit brighter.
So, next time you’re planning to can some tomato soup, remember to pick those paste tomatoes or mix in some random ones for a flavorful, homemade soup that you can enjoy all year round.
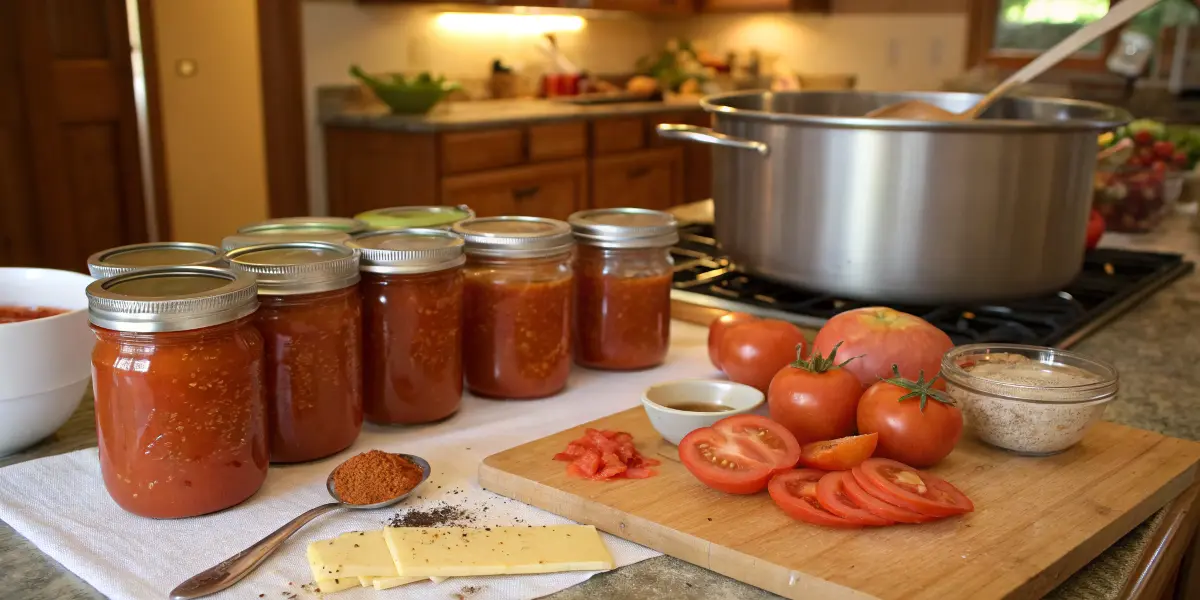
Preparing Your Tomatoes
Getting your tomatoes ready is a crucial step in canning homemade tomato soup. You want to make sure you’re starting with the freshest and best quality tomatoes for the best results. Here’s how you can prepare them efficiently:
Peeling and Seeding
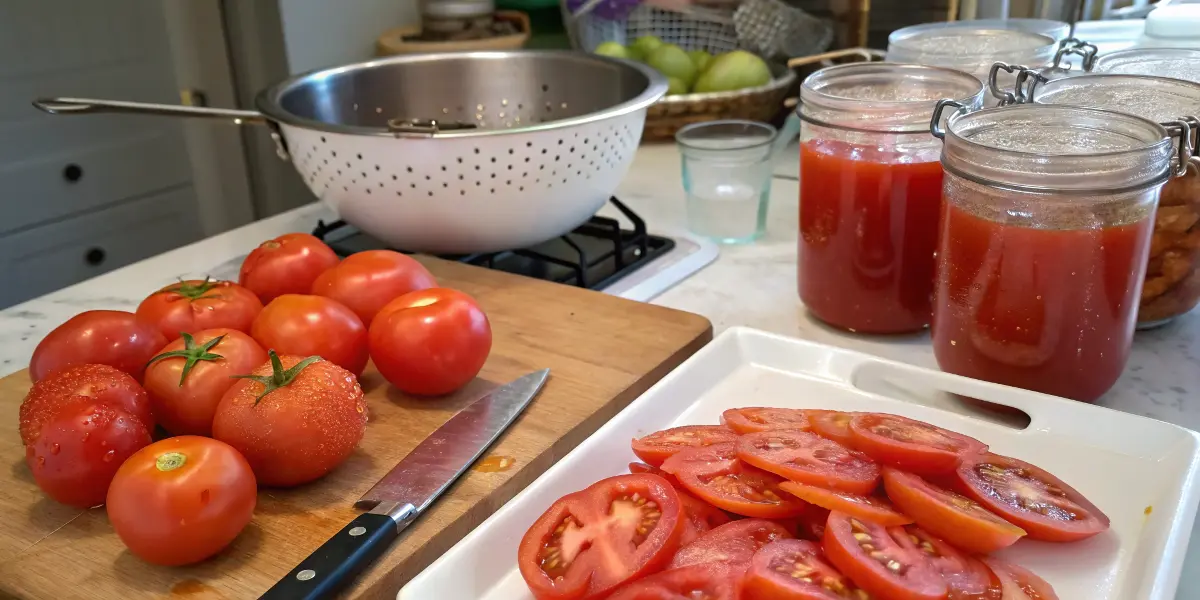
- Start by washing your fresh tomatoes thoroughly. This ensures any dirt or chemicals are removed.
- Bring a large pot of water to a boil. Once it’s boiling, drop in your tomatoes for about 1-2 minutes.
- Quickly transfer the tomatoes to a bowl of ice water. This makes peeling them a breeze.
- Once cooled, peel off the skins. They should slip off easily now.
- Cut the tomatoes in half and scoop out the seeds. This step is essential to avoid a bitter taste in your final product.
Chopping and Cooking
- Chop the peeled and seeded tomatoes into chunks. This step is important because it determines the texture of your soup.
- Place the tomato chunks into a large pot. Add a bit of tomato juice to prevent sticking, and bring them to a simmer.
- Stir occasionally as the tomatoes cook down. This should take about 20-30 minutes.
- Once cooked, you can blend the tomatoes if you prefer a smooth soup, or leave them as is for a chunkier texture.
Preparing your tomatoes might seem like a lot of work, but it’s a labor of love that pays off when you taste that first spoonful of homemade soup. Remember, the more care you take now, the better your canned soup will be.
With your tomatoes prepped, you’re now ready to move on to the canning process. This is where all your hard work starts to come together into a delicious, preservable meal. Happy canning!
The Canning Process Step-by-Step
Canning your own tomato soup might sound daunting at first, but once you get the hang of it, it’s a breeze. Let’s break it down into simple steps so you can enjoy your homemade soup all year long.
Sterilizing Jars
Before you even think about filling those jars with your delicious soup, you gotta make sure they’re clean. While you don’t need to sterilize jars anymore, they still need to be washed and preheated. You can pop them in the dishwasher for a quick cycle or fill them with hot tap water and let them sit. This prevents any cracking when they hit the hot water later.
Filling and Sealing Jars
Once your jars are ready, it’s time to fill them up. Pour your soup into the jars, leaving about an inch of space at the top. Add a tablespoon of lemon juice to each jar to keep the acidity right. Wipe the rims with a clean cloth to remove any soup residue. Then, place the lids on top and screw the bands down until they’re just tight.
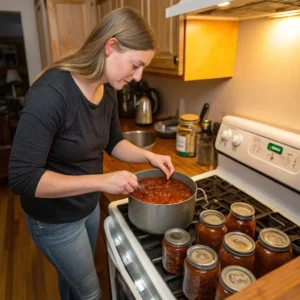
Processing the Jars
Now comes the actual canning part. Depending on your equipment, you might use a pressure canner or a water bath canner. For pressure canning, adjust the pressure based on your altitude—check out a reliable chart for this. The processing time varies, but generally, you’ll need about 20 minutes for pints and 25 minutes for quarts. Once the time is up, let the canner cool down before removing the jars.
After canning, let the jars sit undisturbed for about 12 hours. This helps ensure they seal properly. If you hear a pop, that’s a good sign!
And there you have it, your very own canned tomato soup, ready to be stored and savored whenever you like. Keep your jars in a cool, dark place, and they’ll be good for months. Enjoy the taste of summer tomatoes even in the dead of winter!
Storing and Enjoying Your Canned Tomato Soup
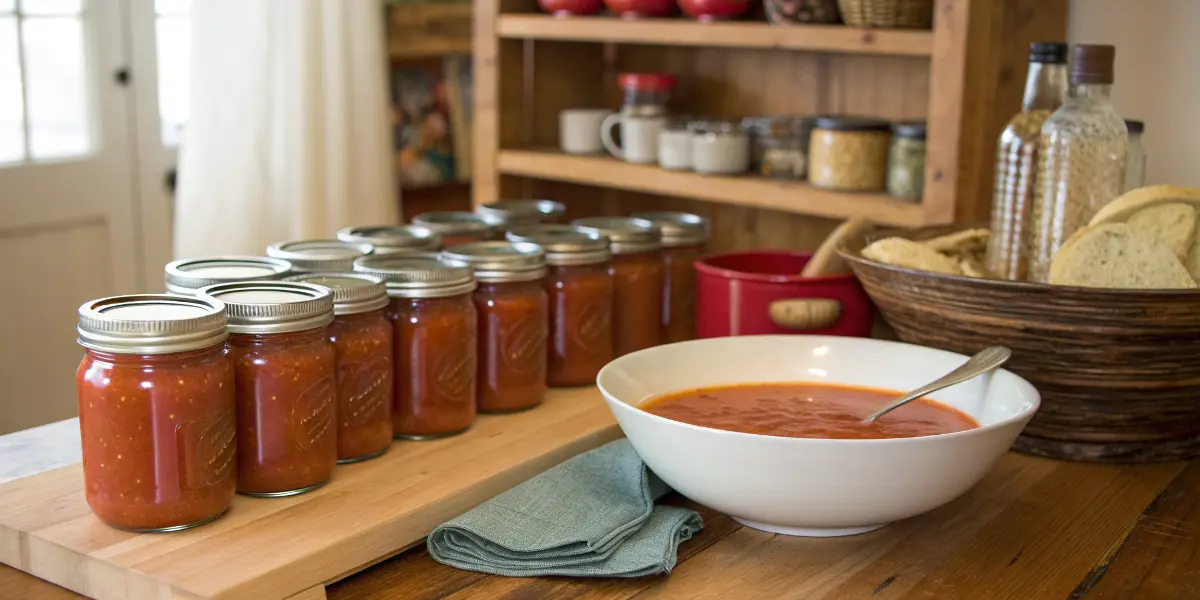
So, you’ve gone through the canning process, and now you’re left with beautiful jars of tomato soup. Here’s how to store them and make the most out of your efforts.
First things first, check those seals. Make sure each jar is properly sealed before putting them away. If any jars didn’t seal, pop them in the fridge and enjoy within a week.
Storing Your Canned Soup
For the jars that did seal, find a cool, dark place to store them. Think of a basement or a pantry shelf that’s away from direct sunlight. This helps keep the soup fresh for up to a year. Remember, temperature and light can affect the quality of your canned goods.
Keep an eye on your jars over time. If you notice any changes in color or if the lids pop, it might be time to toss them out.
Enjoying Your Finished Soup
When you’re ready to enjoy your finished soup, it’s as easy as opening a jar. Pour the soup into a saucepan and heat it up. For a creamier texture, stir in some milk or cream while heating.
Feeling adventurous? Here are a few ways to jazz up your tomato soup:
- Add a sprinkle of cheese on top.
- Stir in some fresh basil or oregano.
- Pair it with a classic grilled cheese sandwich.
There’s nothing quite like enjoying the taste of summer tomatoes in the middle of winter. Your homemade canned soup brings a touch of warmth and nostalgia to any meal.
And remember, this soup isn’t just for sipping. Use it as a base for chili, casseroles, or even pasta sauces. The possibilities are endless, and your taste buds will thank you!
Troubleshooting Common Canning Issues
Canning tomato soup is a rewarding process, but sometimes things don’t go as planned. Here’s a guide to help you troubleshoot some of the most common hiccups you might encounter.
1. Jars Not Sealing
One of the most common issues is jars not sealing properly. If your jar lids don’t seal, first check that the rims are clean before placing the lids. A small amount of residue can prevent a proper seal. Also, ensure the lids are new and not damaged.
2. Siphoning
Siphoning occurs when liquid escapes from the jars during or after processing. This can often be due to rapid changes in temperature or pressure. To minimize siphoning, make sure your jars have the correct headspace and allow them to sit in the canner for a few minutes after processing before removing them.
3. Separation of Ingredients
Sometimes, you might notice the soup separating in the jar, with solids at the top and liquid at the bottom. This is usually due to the natural settling of ingredients. To reduce this, ensure you’re using the right type of tomatoes and cooking the soup thoroughly before canning.
4. Cloudy Liquid
If the liquid in your jars appears cloudy, it could be due to using table salt instead of canning salt. While it’s not harmful, it can affect the appearance of your soup. Stick to canning or pickling salt to keep your soup looking clear.
Remember, canning is both an art and a science. Each batch might teach you something new. Don’t be discouraged by a few bumps along the way!
5. Mold Growth
Mold can form if jars aren’t sealed correctly or if the soup wasn’t processed for the right amount of time. Always check seals and ensure you follow processing times closely.
6. Off Flavors
If your soup tastes off, it might be due to leaving skins or seeds in the tomatoes, which can turn the soup bitter. Always peel and seed your tomatoes for the best flavor.
By keeping an eye on these common issues, you’ll be better prepared to enjoy your homemade tomato soup all year round!
Conclusion: Enjoy Homemade Tomato Soup Year-Round
Congratulations! You’ve mastered the art of canning your very own homemade tomato soup. Now, you can savor the taste of summer tomatoes even in the heart of winter. There’s something incredibly satisfying about popping open a jar of your own creation, knowing you’ve preserved the best of the season.
- Convenience: Having jars of tomato soup ready to go means quick meals are just a step away. Whether you’re in the mood for a comforting bowl of soup or need a base for a more elaborate dish, your pantry is stocked.
- Flavor: Homemade always tastes better. You’ve avoided all those preservatives and excess salt found in store-bought options. Plus, you can tweak the spices to suit your taste.
- Versatility: Use your canned soup as a starter for other recipes. Add a splash of cream for a rich, creamy soup, or spice it up for a different flavor profile.
Enjoying the fruits of your labor isn’t just about eating; it’s about the entire experience. From selecting the perfect tomatoes to the final spoonful of soup, it’s a journey worth taking.
By canning your own tomato soup, you’re not just making food—you’re creating memories. So go ahead, relish in the simplicity and joy of homemade goodness, and share it with friends and family. Here’s to delicious meals and warm memories all year long!
Wrapping It Up
So there you have it, folks! Canning tomato soup isn’t just for the pros—it’s something you can totally do at home. With a bit of patience and some fresh tomatoes, you can stock your pantry with jars of homemade goodness that’ll make those chilly days a bit cozier. Plus, there’s something really satisfying about popping open a jar of your own soup, knowing you made it from scratch. Whether you’re a seasoned canner or just starting out, this is a great way to preserve the taste of summer all year round. So grab those tomatoes and get canning—your future self will thank you!
Frequently Asked Questions
Why should I can my own tomato soup?
Canning your own tomato soup lets you enjoy fresh, homemade soup all year round. It also helps preserve the taste of ripe tomatoes and allows you to control the ingredients, avoiding preservatives and additives.
What kind of tomatoes are best for canning soup?
Paste tomatoes like Roma are great for canning because they have thicker walls and less water, which makes the soup thicker and more flavorful.
Why do I need to add acid when canning tomato soup?
Adding acid, like lemon juice or citric acid, ensures the soup is safe to store on the shelf. It raises the acidity level, preventing bacteria growth.